Friday 30 October 2015

Bald Cap Application

Bald caps are a fundamental part of creating a character if you want to cover the hair and put a wig on or create a more abstract character. Learning this technique is useful in enabling me to be able to create a more diverse range of looks, and creating a blank canvas on the head which I can then fashion however I would like.

Products Needed


  • Pintail comb
  • Hairbrush
  • Water in a spray bottle
  • Kryolan Supracolour Palette
  • Sponges
  • Strong hair gel
  • Matte spirit gum
  • Kryolan Ultrafoundation Palette
Method

  1. Spray all of the hair with the water, making sure that it is all wet. 
  2. Next, spread the hair gel across all of the hair. Brush through to make sure that it is spread evenly. 
  3. Now apply the bald cap. If it does not fit your model's head, cut around the edges so that it fits. 
  4. Using a cotton bud, apply the spirit gum underneath the edges of the bald cap so that it is flat on the head and blends in with the skin. 
  5. Using the supracolour palette, mix white and red to create a pink colour. 
  6. Brush onto the bald cap so that it matches the skin and the Ultrafoundation palette can be used after if need be to create a more realistic skin tone. 

Monday 26 October 2015

Props For My Character

In order to add to the realism and characterisation, I made a list of what props and clothing I needed to dress my model with:


These items were relatively easy to accumulate. I have managed to borrow a shirt, tie and skirt from some friends. Moreover, the plate and the fork are props that I will bring from home. I want to use these as it puts the situation into perspective better; the viewer will hopefully see it clearly that my character has got into a nasty food fight at school.

The shirt and tie I have borrowed. 

This is what the black skirt I have borrowed looks like. 


Wednesday 21 October 2015

Planning my 'Food Fight' look


These are my notes for planning my look. It includes what products I will need, what looks I want to create and how I will form the characterisation. 

To really know what products I will need and how I want the effects to look, I will need to practice the look without the wound. This is to make sure that I can make my character look flustered and upset, which is important to add to the realism and characterisation. Like I've noted, I would like to add tears, red cheeks, eyes and nose as the character will have been crying, been angry and will be in distress. I will consult friends to see whether they can contribute to the costume, and if they cannot then I will look at the styling rack at uni to see if there are any clothes I can borrow, and if worst comes to worst, then I can buy what I need. 

For the wound, I will need products that make it look fresh and painful. These include:
  • Wound filler
  • Fake blood
  • Supracolour/Aquacolour for colouring
  • The alcohol activated palette to colour the wound
  • Mac 'Shine' mixing medium for tears
I will be able to borrow wound filler and fake blood from university, and I have the other products in my kit, so there is no need to buy any more materials.

I also created a quick character profile in order to be able to visualise my character:


Tuesday 13 October 2015

Creating a Mould

I have written up a step by step guide on how to create a mould, from what we learnt in the lesson when moulding our wounds. I also made this into a word document so that I can easily go back to it for reference, and can print it out if I need to create a mould again and want to bring it to class or bring it to the studio if I make one in my own time. I did this last year after every technical session and found it very useful and a helpful way to learn a complicated technical method step by step because I am able to remember and learn with ease this way.

During the lesson, I found time management very difficult. At the start, up until it came to using the scales, I was not encountering much difficulty. However, when it came to the scales, that is when my timing went out the window. Unfortunately, because of the large demand in the class, it took me an hour to get hold of scales, which affected me negatively in that when I was finally able to create my silicone mix and create my mould, others' had already set and they were onto the next step. This meant that by the end of the lesson, my mould had not even set yet and so I am going to have to do the baldiez step and last step in another lesson. This was disappointing as I would have liked to be able to see my mould completed, however I know that next time I will need to be even quicker when it comes to completing the first steps and making sure that I have enough time to complete all steps.

Moreover, I did not come completely prepared. Because my bag was not big enough, I didn't bring my whole box of gloves and so I only brought 3 pairs. This meant that I could have contaminated my silicone had I not borrowed more, which was a mistake on my part and something that has definitely taught me to bring everything whenever I am creating a mould. The benefit of this is that I still have more of this process to finish, and so in my lesson on Monday I will know to bring absolutely everything and not have the potential to contaminate my products.

During the lesson, I did not enjoy the stressful environment of the classroom. Being in a room with a lot of students who were also trying to remember all the information we were given in the class and stressing about time management and being able to use the scales was irritating, however it did teach me to be calm in a stressful environment and get on with what I was doing despite the chaos around me. This is most likely a glimpse as to what it is like in the working world, and it is something that a professional makeup artist has to acclimatise to.

What I did enjoy was the scientific aspect and technical challenges. It was a step further than makeup; it was, like Kat says, 'cooking' something and that was exciting in that you are creating something from scratch, and something that you can use more than once. You are creating your own prosthetic and using resources to materialise an idea. However the possibility that what you were making could not set or could be contaminated was not exciting, but I found that this made me very careful in my practice.

HOW TO CREATE A MOULD

Equipment used

  • Cling film
  • Scales
  • Measuring cups
  • Black gloves
  • Scissors
  • Medical face mask
  • Fixing spray
  • Petrolease
  • Glue gun
  • Silicone A
  • Silicone B
  • Wooden sticks
  • Baby wipes
  • Couch roll
  • Isopropyl alcohol
  • Super Baldiez
  • Brush (paintbrush or clay brush)
  • Hairdryer
  • Deadener
  • Pigments
  • Flat metal clay tool
  • Naphtha
  • Baby buds
  • Sandwich box
Method

  1. Cover your workspace with cling film
  2. Cover the scale with cling film
  3. Cut your cup in half through the middle so you are left with two ‘O’ shapes
  4. Make sure you have a face mask on at this point. Take the fixing spray, shake it, and go to an open window. Then spray your wound with it at a distance of about 20cm. 
  5. Leave to dry for a moment.
  6. Repeat this process, but with Petrolease. 
  7. Next, put the cup on top of the wound (making sure the top is on the plastic, as it is ridged and thicker). 
  8. With the glue gun, glue around the outside of the cup to make sure that no silicone can spill out. Do not put the tip of the gun in the glue, make sure you are at a distance. 
  9. Wait for the glue to dry and make sure the cup is secure. 
  10. Put some gloves on, get a new cup, and at this point you will need to measure Silicone A and Silicone B exactly. 
  11. Get two wooden sticks and mark them ‘A’ and ‘B’.
  12. Put the cup on the scale. Take Silicone A and stick A, and start scooping it slowly into the cup. You will need about 30 grams of this for your small wound.
  13. Change your gloves so as to not contaminate your silicones. Now do the same with Silicone B and stick B. 
  14. Once done, throw your gloves away and clean both tubs of silicone with baby wipes so there is no chance of contamination. 
  15. Get a new stick and slowly stir the contents of the cup, making sure that there are no air bubbles. If there are, gently bang the cup onto the table. The air bubbles will give the mould an undesirable texture.
  16. Pour back and forth onto the wound, making sure that it is nicely covered. 
  17. Give this an hour to dry. 
  18. Once dry, put some isopropyl alcohol on some couch roll and clean the mould. 

Baldiez
  1. Get a new cup and some new gloves. At this point you will be mixing Super Baldiez and isopropyl alcohol to mattify the top of the mould and create an even surface. The ratio has to be 1 part super baldiez to 2 part isopropyl alcohol. 
  2. Pour the super baldiez into the cup, up to about the line that represents ’25’ (the first marked line is ’50’),
  3. Next, pour the alcohol up to the line that represents ’75’. 
  4. Mix, and make sure that there are no air bubbles.
  5. Spray the mould with Petrolease.
  6. For this small wound you will need to apply about 2 layers. 
  7. Pour some on the mould in the middle, and use a brush to distribute it evenly and to get rid of the air bubbles. 
  8. Let it dry and apply another layer. If necessary, you can apply a third layer after this.
  9. Dry with a cool hairdyer, and make sure that it is not powerful. Don’t put the hairdryer too close to the mould. 

Last layer
  1. Get three sticks, and mark them ‘A’ (Silicone A), ‘B’ (Silicone B), ‘D’ (Deadener). 
  2. You will need the same amount of Silicone A to Silicone B, and the deadener has to amount to 60% of the total of them combined. 
  3. In this case, you wil use 8 grams of A and 8 grams of B, which total to 16 grams. 60% of this is around 10-12 grams, and so you will need this amount of deadener. 
  4. The more deadener, the more fleshy the effect will be. In my case, because my wound will be on the face, I will need to use about 12 grams of deadener as it will be softer. 
  5. Get a new cup and new gloves. Put the cup on the scale, and with stick A, pour silicone A into the cup until there is 8 grams. 
  6. Change your gloves, and do the same with silicone B. 
  7. Change your gloves again, and pour 12 grams of deadener with stick D into the cup.
  8. Throw the gloves away, and wipe all the tubs again. 
  9. Mix the contents making sure that there are no air bubbles.
  10. At this point, you will need to put a drop of pigment in, and the colour of this depends on your model. Make sure that you only put a drop in as it is extremely pigmented. 
  11. Once done, fill the wound and mould with the product and use the flat metal tool you use for clay to run it over and fade out the edges. 
  12. Let this dry. Once dry, you can use a baby bud and Naphtha (lighter fluid) to dissolve around the edges of the silicone. Do not pour it all over the wound or it can dissolve the whole thing. 
  13. Put your mould into a sandwich box so it is safe.

Skin Texture

Despite the fact that my wound didn't necessarily need a lot of texture, I find it interesting exploring how to texturise the skin on clay as I would like to use it in the future and it's an imperative technique when creating realistic prosthetics.

I found an article that outlines steps towards creating realistic skin texture on clay. Paint-sculpt.com says that there are seven steps:


I gather from this page that the primary and secondary textures are the direction in which the lines go, and they are the base. I assume that a sharp tool will be needed for this as they are the deepest lines. From step three, this is where the real texturising of the skin begins. What I think I should do when attempting this is researching how the skin behaves more, and the characteristics of skin, which I can do by collecting photos of skin textures and practising on clay. Also if working on a client, taking photos of their skin and making notes of the details of it and its contraindications will enable me to replicate their skin realistically. 

Despite the fact that this page is about skin textures for final sculptures, the lining techniques are helpful to know for prosthetics. I want to be able to practice these techniques when creating my human hybrid, however I need to better my ability when using the brushes that we were given in order to create these soft lines. On my wound that I created I feel as if it is very one dimensional, which I feel is my first challenge to conquer, and so I decided to watch a video that might inform me further.

For a more detailed explanation that I was able to watch,  I went on Youtube and watched this video about sculpting realistic skin on plasticine:


I found that the video was very specialist; the creator had made a lot of his own tools and he was clearly very experienced, however I sat and made notes on what techniques I found useful and which I would use, knowing that I would not be able to use all of them though as I feel as if that would be throwing myself into the deep end. This video helped me understand the use of different tools and materials that I wouldn't have thought of before, and has inspired me to invest in them to be able to experiment with and create more realistic skin textures on clay, which will eventually help me create realistic moulds and prosthetics in the future.

Things I derived from the video:

  • Plastic: Plastic looks as if it is a really helpful material combined with the tools. The problem I found when trying to make lines in my mould was that it would also take clay away and create shaving-type effects that I really did not want, however the plastic seems to make the lines without taking any clay away. Hopefully this is a way in which I can avoid that problem now, and so I will invest in some of this plastic. 
  • Rake tool: The home-made rake tool that the creator of the video had looked very useful, and while watching I was wondering what type of tools could also create this look. I believe that a sharp plastic fork would give a similar effect, and so this could be something I try if I want to create wrinkles with the plastic. 
  • Stippling sponge: The stippling sponge is definitely something I will invest in. Not only is it something I can use in special effects makeup but I did not think of the fact that it can create skin texture, and so I will buy this as it has multiple purposes. 
  • Slip: In this video I learnt the term 'Slip'; a pottery term for a watered down clay. It has multiple purposes: firstly to smooth down holes made with a needle to create a goosebumps effect; secondly you can flick slip onto the plasticine/clay and it will texturise the skin further. Moreover, in my last mould lesson Sue told us about 'Naphtha', a lighter fluid, which we could use to smooth the silicone for our mould. In this video, this is what you combined with the clay to create the slip, and so investing in this would be useful for its multiple purposes. 
  • Warming the clay: Again, like in one of our lessons, we were taught to do this to make the clay more malleable, however in the video the other purpose of doing this is to create heavier marks in the skin, and so it is something I can experiment with too. 
  • Isopropyl Alcohol: This is something we used in class to mix with super baldiez, however in this video the purpose was to spray it onto the clay to soften the skin. I believe that this would be a sensible investment too because clearly it is multi-purpose, and I also know from previous lessons that this is an effective brush cleaner. 
  • Talcum Powder: In our lesson we were told to powder our moulds, and the creator of the video also used this technique. For him, it was to soften the texture of the skin and absorb oils. Therefore it is multi-purpose and would be useful in my kit.


Resources: 

Paint-sculpt.com., (Year of Publication Unknown). Sculpting Realistic Skin Texture [viewed 13/10/2015]. Available from: http://www.paint-sculpt.com/tutorials/sculpting-tutorial/sculpting-skin-texture.html

Bray, S., 2014. Sculpting Prosthetics: Skin Textures [viewed 13/10/2015]. Available from: https://www.youtube.com/watch?v=1IAc2hDCHlQ


Monday 12 October 2015

Sculpting My Wound


These are photos of my wound before it is made into a mould. I would have benefitted from taking photos of what I had created in the lesson, because during then I was given advice by Sue to raise the wound, and by Kat to make it less neat, and so if I had before and after photos it would have shown the progress better. So I know now that it is important to take progress photos in order to see the improvements you have made, which I will do when creating prosthetics now. 

From my previous posts, I gathered information about what the wound would look like and I deciphered how I wanted it to look. From my research, I discovered that the skin in the wound would be ragged and ruined, and so I attempted to create this effect with a sharp, pointed end of one of my wooden tools. This was effective in creating precise, detailed effects on the wound such as this. I also used this tool to create the tears on the edges of the wound which give the effect that the skin has torn during the sudden trauma; something that I was inspired to do from my research. When it comes to the raised effect of my wound, I attempted to add more clay to the edges of the scratches, however it didn't become as raised as I would like. In my 'Wound Type: Fork' blog post, I mentioned how I wanted to recreate the raised effect around the wound like one of the photos that I included as I believed that this was realistic, and it was something that Sue had suggested to me in class too. I am disappointed that it did not turn out like that as this does not lend to the fresh effect of the wound, and I believe that if I had started the wound again I would have had a better chance of recreating this effect. That experience has taught me not to be complacent with the first wound that I create, but trying again may give me a better outcome.

When it comes to texture, I added small bumps to the skin to replicate spots or moles; I can choose which I want when painting the wound on the face. I am pleased with how these turned out, however I would have liked to add more skin texture such as lines, and used different tools that I didn't get in my kit such as a toothbrush to create pores. Despite this, my partner Amelia has very good skin and is young, and so there won't be as much texture on it compared to if I were creating a mould for someone with really aged skin, someone with acne or someone with scars or large moles, therefore I did not feel the need to add a lot of marks to the wound as it would not have looked realistic on Amelia's face. In addition to this, the wound will be fresh and so there will be blood surrounding it; not allowing much of the skin underneath to be seen anyway. 

I feel as if I began to understand the clay tools the more I used them, and found the ones that scrape away the clay particularly helpful as it gives a clean, even surface, and they allow the edges to be very smooth and blend into the surface of the plastic. Next time I create a prosthetic with clay I feel as if the experience I have gained with the tools will enable me to create more realistic prosthetics, which will benefit me when creating my human hybrid. 


Characteristics of my Wound

I want to look further into the characteristics of a fresh wound so that I can realistically create one.

I found a table which distinguishes the effects of lacerations compared to an incised wound, and I believe that mine would be an incised wound:


And from this table, I can gather that my wound will tail off at the end. This would definitely be the case with a sharp knife, however a fork is blunter than a knife and so I believe that the ends would be thicker than if it were a knife. 


References:

ForensicMed., Date Unknown. Table of differences between lacerations and wounds [digital image] [viewed on 06/10/2015]. Available from: http://www.forensicmed.co.uk/wounds/blunt-force-trauma/lacerations/ 

HowMed., Date Unknown. Incised and Stab Wounds [digital image] [viewed on 06/10/2015]. Available from: http://howmed.net/forensic/incised-and-stab-wounds/

Tuesday 6 October 2015

Brainstorming

Fork wound situations- what is a realistic scenario in which someone will be injured with a fork? I wrote down all my ideas and also my housemates' ideas on a mind map:


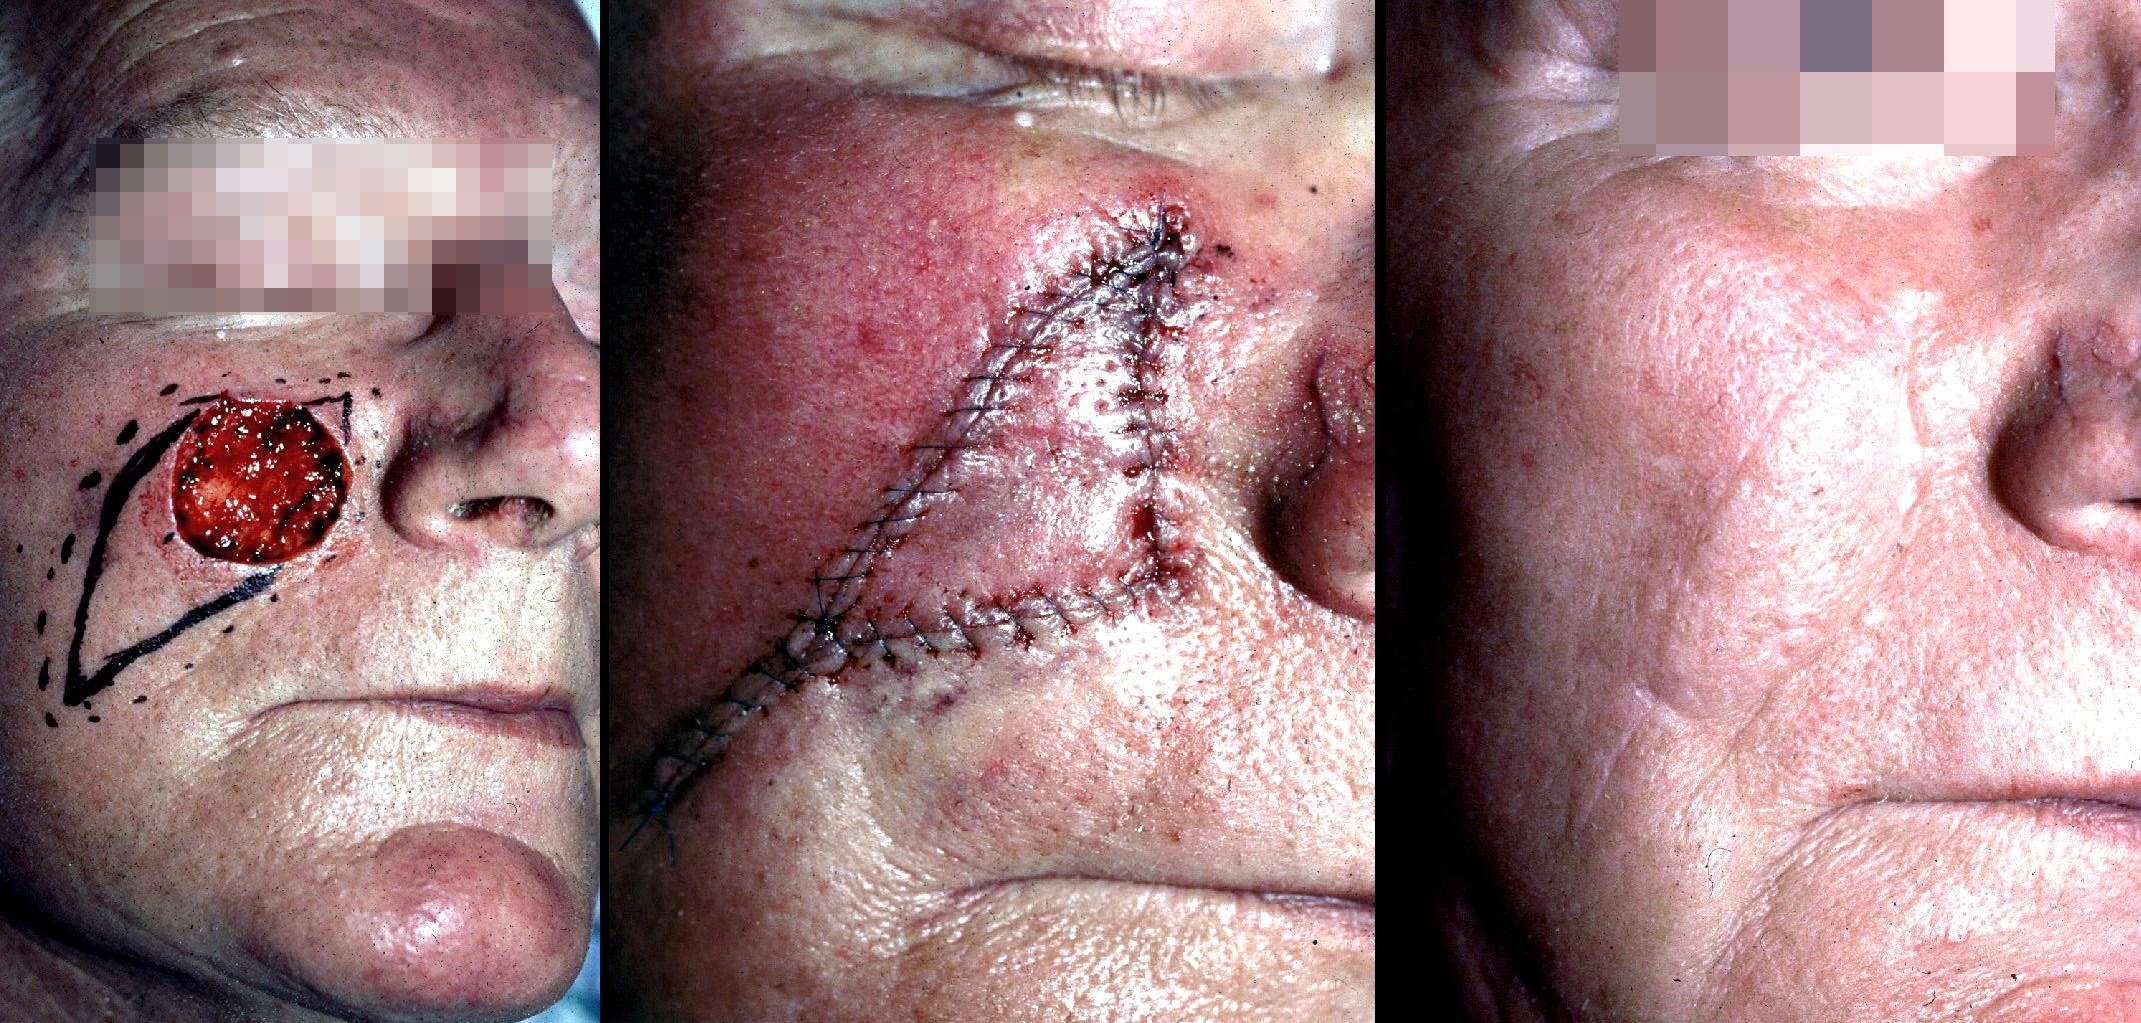
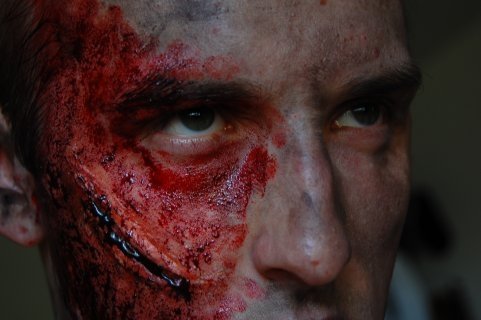
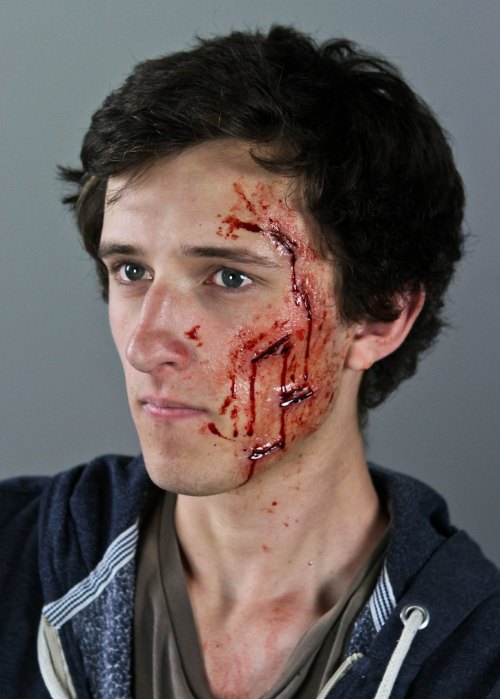
I thought that the food fight was the most realistic situation that I would be able to create and shoot in the studio. And from my previous research, I think that a scratch wound would be interesting and a challenge for me. The injuries that entail being impaled would be too complicated for me in my opinion, I would like a surface wound that I will feel confident to create on my first attempt of creating a wound.

Once I had decided my situation, I needed to think of where this food fight would likely occur. This meant creating another mind map and also consulting my housemates again:


Here are the food fight ideas. 

Old people's home: with this idea I thought that I would be able to utilise other skills that I have learnt in our lessons such as applying wigs and old age makeup. However this would require using a lot of different products, and also buying a range of different clothes for the costume as old age clothes would not be freely accessible to me. 

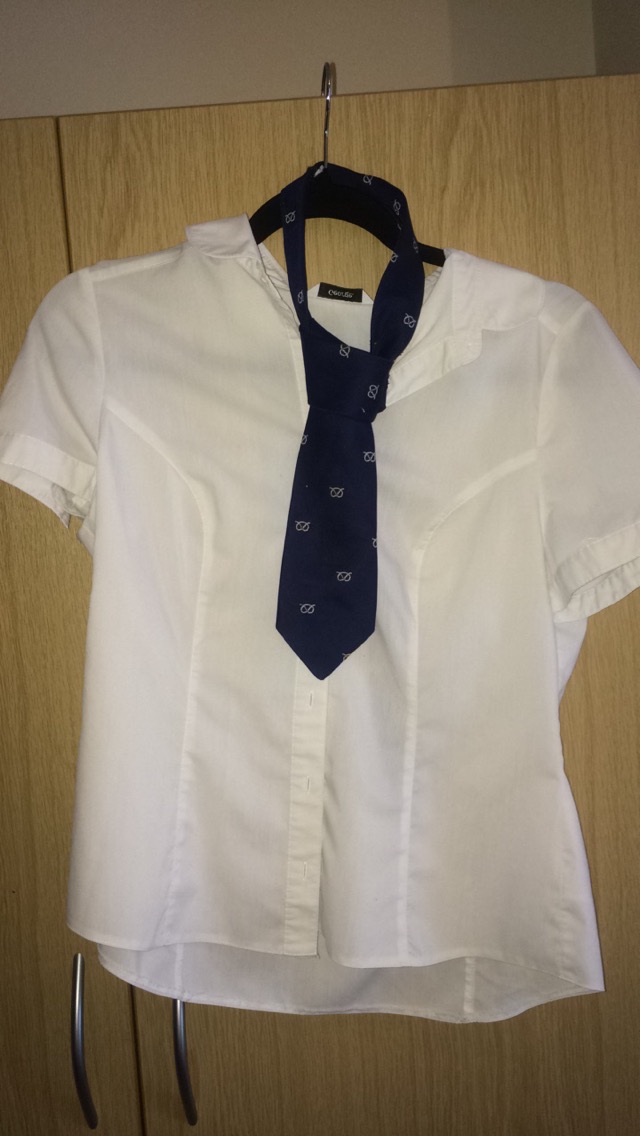
School: The costume for a school scenario would be accessible to me as my housemates and I will have clothes that are school-like. I thought that a realistic scenario would be a food fight at school gone too far, and/or bullying. Moreover, I can still apply different makeup techniques such as making my character look angry, upset and flustered. 

Prison: For this look I would have to buy a prison jumpsuit which would be costly, however would be effective characterisation as the viewer would straight away realise that they are a prisoner. In addition to this, I would be able to use the bald cap technique that we are going to learn, and probably also the facial hair technique. This would show that I am using and applying my learning from this year. I think that a food fight at a prison is a believable scenario too. 

Restaurant: I don't think this is a very likely scenario. Also I am not sure how I could add to the characterisation in a studio to make it obvious that the character has got into a fight in a restaurant. 

Student Halls: I feel like the costume for this could be achieved but not believable. I would put the character in a freshers t-shirt, but I don't think it's likely that a student would be wearing this in a casual situation in halls. 

Family meal: I think that the characterisation of this would be difficult to link with the setting as I am not sure how I would be able to set up a family meal in the studio. Moreover, like in some of the situations, the costume will not make it obvious as to what the situation the character is in. 

After much deliberation, I have chosen to base my character on a schoolgirl who gets into a food fight at school that goes wrong. I feel as if the fork scratch on the face is a likely scenario as a feisty student can go too far in an argument and go for my character's face. Also, I think that the characterisation will be easier and more recognisable for the viewer, especially as it will be shot in the studio and this means that the costume and makeup will need to be observable. 

I found brainstorming extremely useful in that I found that ideas I thought would be feasible actually were not the more that I wrote down and thought about the pros and cons. 


Placement of the Wound and Anatomy

I would like to place my wound on the cheek, and the tool will be a normal dinner fork. This way the wound won't be too big, and it will have been created in a realistic situation, like a heated debate over dinner. When it comes to the cheek, I need to be aware of the layers of skin and what the wound will look like, especially when fresh. Being freshly made, the wound won't have had time for infection, and so I will only have to deal with fresh flesh, blood and cut skin.

The bottom layer of the cheek are the muscles, above that is subcutaneous fat which is covered by the skin. However due to the fact that my injury will be caused by an everyday fork, I don't think it will be able to go as far down as the fat.

This image shows a cheek that has been surgically cut. The open wound is so deep that the fat is visible, and I wanted to use this as an example to show that my wound will not go down that far and so will not be showing this later of the cheek. 

This diagram of the layers of the cheek shows the layer of skin on the top and the superficial fat underneath. Due to the freshness of my wound, I don't believe that this will be visible as the wound will be filled with dark blood. However if I were to create a deep, old-ish wound this would be something to consider. 


References:

MedicalTerms., (Year of Publication Unknown). Lips Cheeks and Palate. Generic Look.com Medical Encyclopedia [viewed 06/10/2015]. Available from: http://medicalterms.info/anatomy/Lips-Cheeks-And-Palate/

Medscape., 2014. Image of cheek reconstruction [digital image] [viewed 06/10/2015]. Available from: http://emedicine.medscape.com/article/1129354-overview 29424.jpg

Anderhuber, F., 2012. Cross section image of a cheek [digital pdf image] [viewed 06/10/2015]. Available from: http://www.researchgate.net/publication/221690462_Anatomy_of_the_Cheek_Implications_for_Soft_Tissue_Augmentation

Wound type: 'Fork'

Fork wounds can entail different injuries, such as being impaled or scratched. While looking at images of both, I have decided to choose the scratch injury as I didn't want to choose something that was completely out of my depth for the first task. With a deep scratch, I can put in the practice and detail without feeling as if I am creating something that is too difficult for me. I would like the wound to be fresh so that I can really experiment with textures, flesh and blood.  I have collated images of scratches and sfx interpretations to inspire me:

I like how the flesh on the inside of this fake wound is corrugated and mangled, and I think that a sharp fork would create this kind of effect. 

Although I don't think my cuts would be this bloody, I like the raised effect of the wound around it, which is believable for a fresh wound. This effect on the skin also happens when animals with sharp claws scratch you too. 

Someone's interpretation of a fork scratch. 

When zoomed into this photo, it is apparent that the skin is peeling from the side of one of the lacerations in his face. 

From even gently scratching a fork on the arm it is apparent that even when using one amount of force, the scratches are not completely even, so that has been something to take note of when creating my wound. I want it to be as realistic as possible so a neat, even wound will not be realistic. 


Photo sources:
@affey_duck., 2015. Image of a makeup artist's fork wound re-uploaded onto @affey_duck's instagram [digital image] [viewed 06/10/2015]. Available from: http://ink361.com/app/users/ig-1235106132/affey_duck/photos/ig-919034375047329026_1235106132 10948996_1568809283374821_847200351_n.jpg

zomgwaffles., 2009. Artist's own creation uploaded to Deviant Art [digital image] [viewed 06/10/2015]. Available from: http://zomgwaffles.deviantart.com/art/zombie-face-cut-2-124437535 zombie_face_cut_2_by_zomgwaffles.jpg

Ebony., 2014. Re-upload of wolf scratch image on Pinterest [digital image] [viewed 06/10/2015]. Available from: https://www.pinterest.com/pin/456411743459222246/ 54bdf7f3256c7395628c54ce530b9707.jpg 

megrosetsfx., 2014. Artist's own creations uploaded to their tumblr account [digital image] [viewed 06/10/2015]. Available from: http://megrosetsfx.tumblr.com/post/96745748563/freakmosfx-cut-face-makeup-created-with-sculpt tumblr_mu56etYiYl1r26q8eo1_500.jpg

Last photo is my own


Introduction to the Project

For as long as I can remember I have always been creative and wanted to endeavour in creative practices, which went from making my own magazines from scratch to constructing my own houses from shoeboxes and cardboard boxes. Through the years I discovered that makeup is my favourite artistic interest and since then have desired to be able to engage in makeup and learn the vast array of  techniques in order to recreate looks and effects that interested me on television and in movies. My favourite genres of film are science fiction, action, thriller and fantasy which are stereotypically associated with special effects makeup, and so this aspect of the course is one which I have been looking forward to for a long while.

I don't have much experience in special effects makeup. I went to sixth form instead of college, and there I did English Literature, English Language, Geography and Media which meant that I was unable to learn makeup, especially this type, and so my only chance was to practice at home with whatever materials I had available. Despite this, I found my Media A-level extremely helpful, especially now in 2nd year. I had exposed myself to a wide range of movies, both because of my love of film and because of the A level, and I learnt how to dissect movies rather than just appreciating their surface value, therefore I gained the skill of understanding the different elements of a movie and their importance. This included analysing costume and makeup; not just its aesthetic value but its metaphorical value and its significance.

I know that at the beginning of this unit I will find it quite hard to grasp everything and remember every single process, however once I get into the routine of consistently practicing I know that I will really enjoy it and gully immerse myself. It is important that I write down everything that I learn so that I have it for reference because special effects makeup is very technical and the health and safety elements are extremely imperative, which makes me paranoid about not doing a process right or contaminating my products. I am also afraid of having creative blocks and not creating things that I'm completely proud which was my problem last year, however I have learned from my mistakes and realise how important practice and research is. Knowing this, I am willing to tackle any challenges I am faced with and I am ready to put the work in.